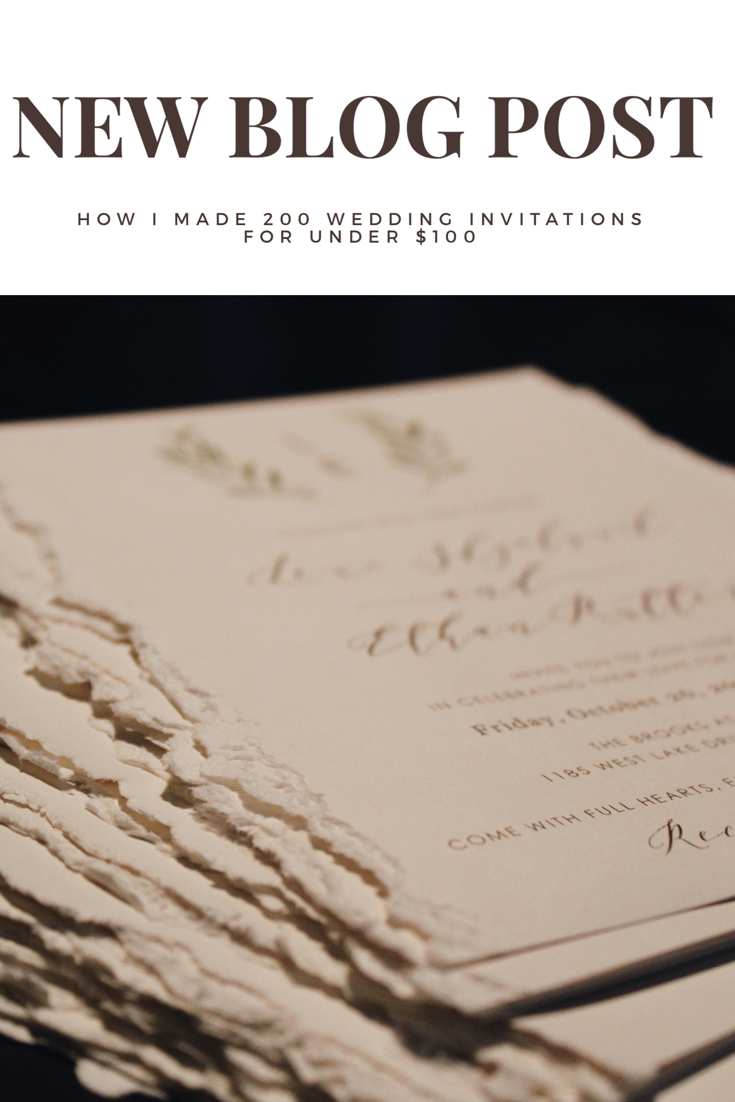

Nowadays popping the word “wedding” in front of something raises the price by what sources say is roughly 500%….WHAT?!
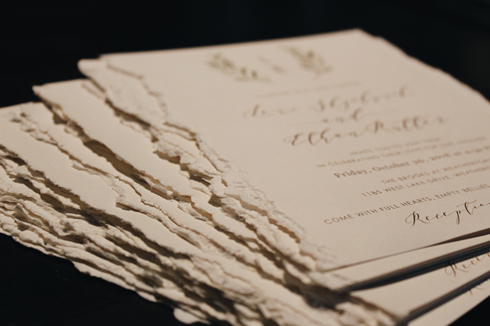
Can we all just take a hot second to question the audacity and complete craziness that is a 500% mark up by one seven letter word? HOLY. COW. I read somewhere that the average wedding in today’s world costs around $36,000. That’s literally more than my car… When I got engaged I made it my mission to not get caught up in spending my money in places where I could be saving it by doing something myself. This includes the insane amount of money that wedding invitations cost. Wedding invitations can cost a solid $300 – $400…for paper goods….That’s equivalent to 12 manicures, 6 pairs of name brand tennies, or 80 Kids Teriyaki Chicken Noodle Bowls at Pei Wei. Excuse me what? Heck no I was not dropping $300-$400 on something I could for sure do myself. Plus – I had a vision for deckled edge papers and wax seals which was going to add additional expenses to my invites as well. So I set out on a mission to find the best deals. After searching for a couple hours I discovered that deckled edge paper on etsy alone is $5 for 5 pieces of deckled edge paper, and that was not a cost I was willing to take so I set out to find a way to make “faux” deckled edges. I discovered that after wetting paper and tearing it in a jagged form that accomplishing my deckled edge look was within my grasp! Next, I needed to find a design for my invitations that I liked which was hard because I am SO unbelievably picky – I wanted simplistic and elegant, yet rustic.
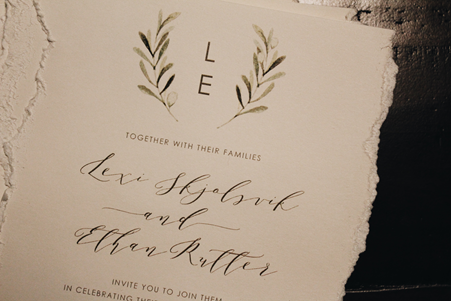
So I searched on etsy for a downloadable template for purchase. That is where I discovered my dream invitation template for about $20.00 from a etsy shop called Paper Dainty. So I purchased it, and began the next step in the process – paper to tear. It had to be thick enough to tear and not rip while still being thin enough to not cost a fortune to mail so off to Hobby Lobby I went. The literal Lord shed blessings on me y’all when I turned the corner and walked down the paper good aisle and saw that beautiful sign displaying 50% off. My heart smiled (-: Now what would have been a $9 buy will only be a $5 buy – can I get an Amen for those HobLob deals?! So I picked up 3 – 50 packs of heavyweight card stock paper, and 4 – 50 packs of 5 x 7 Cream Envelopes.
My vision was slowly coming to life – now all I needed was vellum paper, twine, wax, and a stamp. While searching for velum paper all I saw were single 8.5″ x 11″ sheets of velum paper at $0.25 a piece which would mean I would have to buy a sheet for each invite – which would cost me roughly $40.00 – yeah…YEET NO. I was aimlessly perusing around Hobby Lobby trying to come up with a cheaper alternative when I thought about how when I was younger my parents bought me a book of tracing paper so I could learn to draw by tracing different graphics etc. So I ran to the art supply section at hobby lobby and found that they had tracing paper, but they didn’t have the size I wanted or needed. So I hopped in my car and drove to meet my other friend – Michaels, and quickly found a 14″ x 17″ 50 sheet pad of tracing paper and proceeded to do a little jump for joy. I snagged two packages and after finishing out my craft supply hunt at Michaels I then turned to my other BFF, Amazon, for the wax and stamp – literally what does Amazon not have? Who knows?! But another thing they DO have is wax and stamps – can I get another Amen for Amazon?! So with the power of Prime I ordered the rest of my supplies and began printing and cutting the invitations in preparation for the details and finishing touches.
Here are the Supplies, Instructions, and Tips and Tricks to make your own Wedding Invitations:
Makes 200 Invitation & Detail cards
Supplies:
The basics:
Etsy Template $20.00
3 Packs of Heavyweight Cardstock Paper $15.00
4 Packs of 5 x 7 Envelopes $16.00
The details:
2 14″ x 17″ Package of Faux Velum Paper (aka tracing paper heehee) $25.00
Twine $2.00
Wax $10.00
Wax Stamp $10.00
Instructions:
- Download or create your own wedding invitation template. Tweak it and personalize it with your names and details. Review it to make sure date, time, names, and venue addresses are correct!
- Print 2 invitations side by side on 1 sheet of cardstock paper. (I printed my first one on regular printer paper. I am a very visual and hands on person so I wanted to touch and feel the design and make sure it was what I wanted before I proceeded with printing on the cardstock paper.) 2 packages of cardstock paper will make 200 invitations
- Print 4 detail cards side by side on 1 sheet of cardstock paper. 1 package of cardstock will make 200 detail cards
- Cut invitations and detail cards to separate them from each other and make it easier to tear the paper.
- Cut faux vellum paper in half hot dog style (throwback to kindergarten)
- Cut twine to wrap around the assembled invites, detail cards, and faux vellum paper.
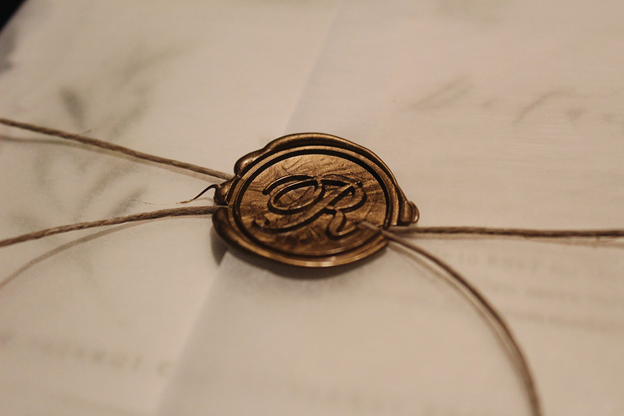
- Heat a pot of boiling water and insert a bowl full of wax cubes to sit on top of the boiling water and melt the cubes. Stir repeatedly until cubes become completely melted and smooth looking.
- Grab a spoonful of wax and pour it on top of the twine and faux vellum paper. Make sure to pour the wax over the fold so that the wax will hold the vellum paper and twine closed. This was definitely easier with two people – one to pour and stamp the wax and one to hold the twine and vellum paper together.
- Press the stamp to the wax and hold for 3-5 seconds. Remove the stamp to reveal your gorgeous wax seal (WOOHOO).
- Repeat 200 times (RIP, but also yay for saving $$$!!)
Tips and Tricks to master your invites:
Recruit Friends, Family, and Bridesmaids! Making your own invitations for a 200+ wedding can be DAUNTING. Ask around! There are always people willing and ready to lend a helping hand. There are so many steps to this process that you can invite 5-10 people all over one night, buy em pizza and snacks, and create an assembly line and give each person a particular task to do. For example, one person can cut the invitation paper, one person could wet and tear the invitation sides, one person can cut the RSVP and/or details paper, one person could wet and tear the sides of the RSVP and/or details paper, one person could be cutting the velum (or faux velum) paper, one person could be assembling all of the invitations into the velum paper, another person could be cutting twine, and another person could be pouring the wax on the twine and invites, and another could be stamping the design onto the invites, and lastly you could have two people stuffing envelopes and addressing names. TEAMWORK is a beautiful thing!! And a necessity if you want to lessen the stress on yourself.
Ice the wax seal stamp! This is imperative if you are waxing all of your invites in one sitting! The reason wax seals work is because the metal of the stamp is cold in comparison to the hot wax so ideally the stamp will imprint on the metal and pop right off leaving a perfect design behind, however if you are doing multiple in a row the metal begins to become too warm to pop straight off, so my mom and I discovered that if in between stamps you put the stamp in a bowl of ice water, dab the stamp on a towel to dry it off then press the wax stamp on the hot wax the design will come out beautifully! So I highly recommend! It may add a little more time to the process, but trust me its WORTH IT to see your gorgeously wax sealed invites come to life.
Use a wet paper towel to wet the sides of your invitation, RSVP, and detail cards. At first my mom and I started wetting the sides of the invitations by dabbing sponge brushes in water and rubbing them on the sides of the paper, however towards the end we found out that it was actually easier to rub a wet paper towel up and down the sides. It was more controlled and the water spread less!
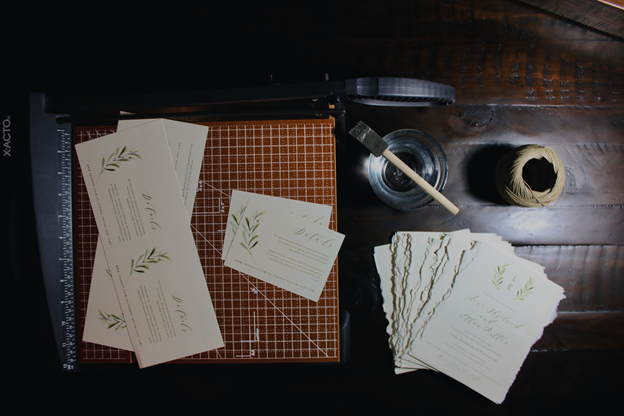
Snag a paper cutter!! This is vital if you don’t want your hands to fall off!!! LITERALLY. Mom and I already had one, but seriously mass cutting the tracing paper, invites, and detail cards shaved so much time and effort off of our plates, and a paper cutter gives you perfect lines so long as you line it up correctly! 😉
Replace paper RSVPs for online RSVPs. I am a supporter of this for many reasons, but the 2 most important would be – 1. Saves Paper #gogreen #savethetrees #theywillbethrownawayanyway. 2. Saves money on postage!! Plus you hardly ever get RSVPs back in the mail and you will most likely have to reach out to people to ask if they are coming anyways so save your time and money and put a link to RSVP online on the details card!
This tutorial can also be used when creating baby shower cards, personalized thank you cards, birthday cards, etc.